
Creating DIY kids’ furniture is a wonderful way to bond with your children while also adding personalized and functional pieces to their rooms. Not only does it provide an opportunity for hands-on learning, but it also helps develop their creativity and fine motor skills. Plus, they’ll love having a piece of furniture that they helped create!
In this post, we’ll explore some simple, fun, and safe DIY furniture projects that you can build with your little ones. These projects are easy to do, budget-friendly, and will make your kids’ spaces feel more special and unique. Let’s dive in!
1. Kid-Sized Picnic Table
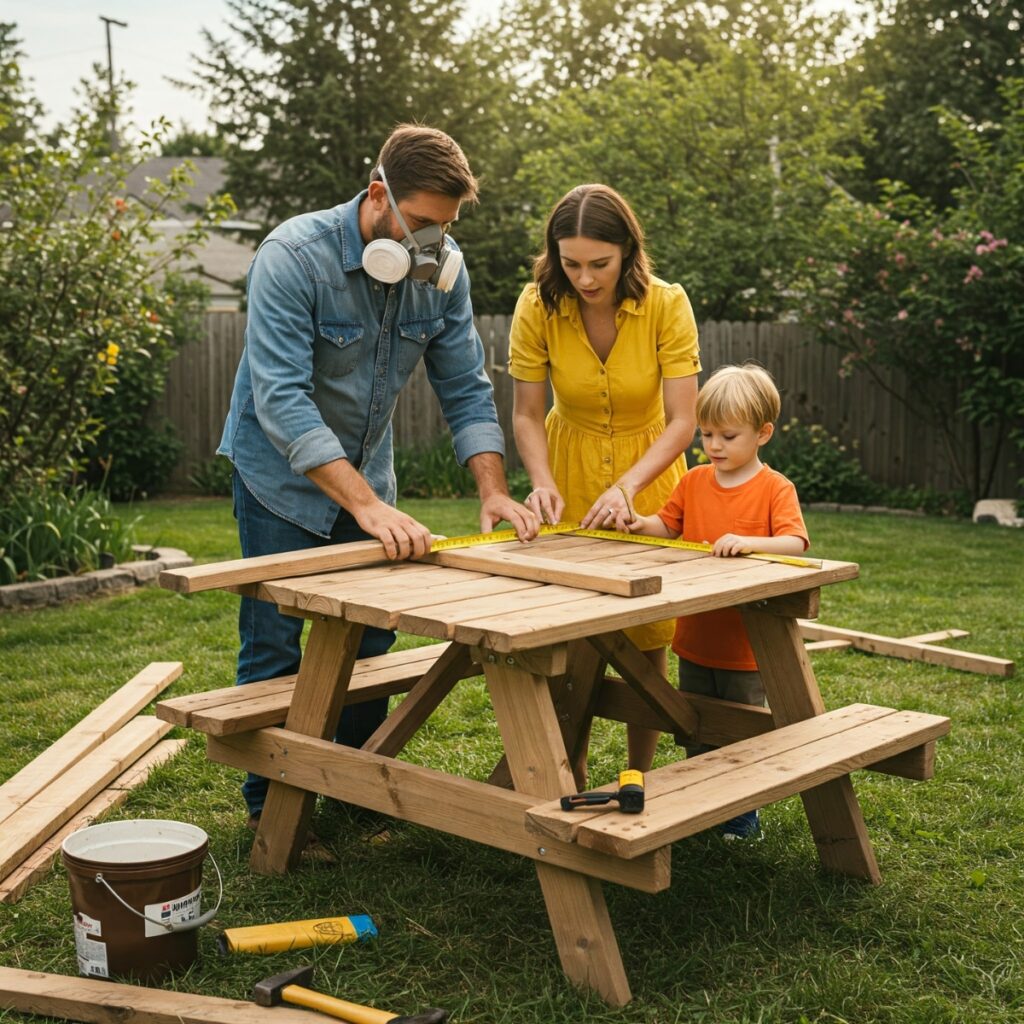
This easy-to-make picnic table is perfect for outdoor playdates or snack time in the backyard. It’s a practical and fun project that will involve your child in every step of the way.
Materials:
- 2×4 lumber (for the tabletop and legs)
- Screws
- Sandpaper
- Paint (optional for decoration)
Steps:
- Cut the 2×4 lumber into the following pieces:
- 2 pieces for the legs (about 18 inches each)
- 2 pieces for the long sides of the table (about 36 inches each)
- 2 pieces for the short sides (about 24 inches each)
- 4 pieces for the seats (about 24 inches each)
- Assemble the frame by attaching the long and short pieces together with screws to form a rectangle.
- Attach the legs to the corners using screws.
- Sand the table and seats until smooth, and let your child help with this part. It’s a great way for them to get involved!
- Paint the table in bright colors or leave it natural for a more rustic look.
This picnic table is perfect for little hands to enjoy snacks, crafts, or outdoor games.
2. Colorful Toy Storage Crates
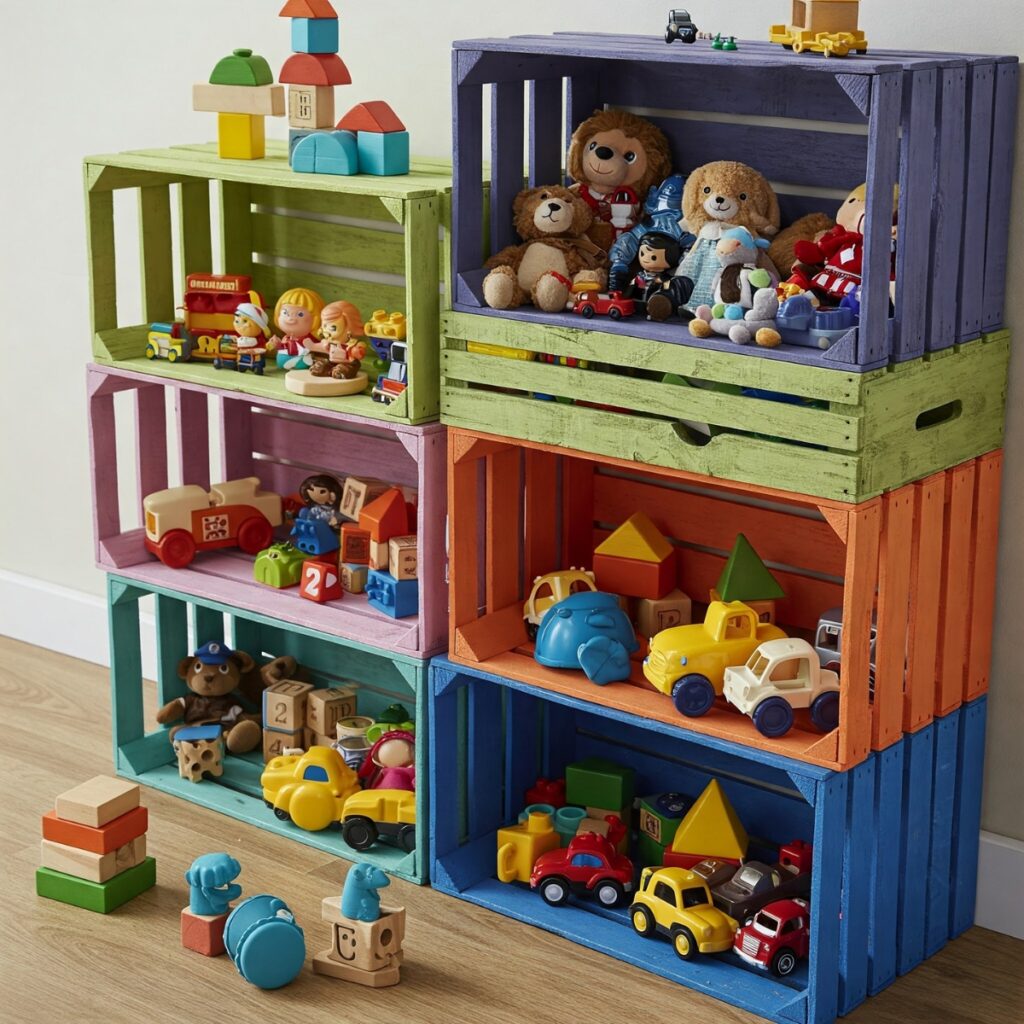
Keeping toys organized is a constant challenge in any home. Why not make storage fun by building colorful toy crates with your kids? These crates are easy to build, and your kids can even help with the painting to make them truly their own.
Materials:
- Wooden crates or wooden boards to build crates (4 sides and a base)
- Screws or nails
- Paint
- Brushes
Steps:
- If you’re building the crate from scratch, measure and cut your wood to the appropriate sizes (4 sides, a bottom, and optionally, a back panel).
- Assemble the sides and base of the crate using screws or nails.
- Sand the crate to ensure smooth edges, and allow your little one to help with this step.
- Let your child pick their favorite colors and paint the crates. You can make them colorful or even decorate them with fun patterns like stars, stripes, or polka dots.
- After the paint dries, add labels or fun stickers to personalize each crate (i.e., “Legos,” “Dolls,” etc.).
These colorful toy storage crates are great for keeping things neat while adding a fun, creative touch to their room!
3. Mini Bookshelf for Little Readers
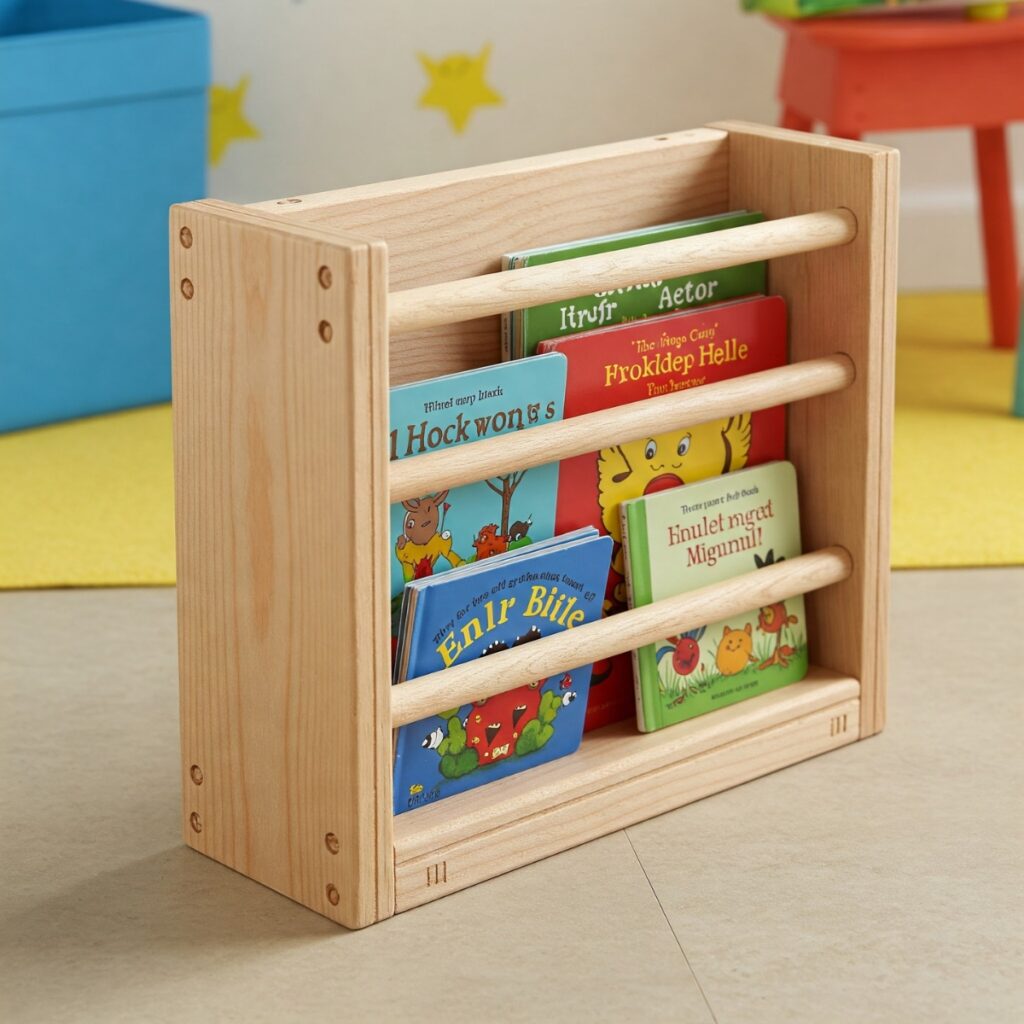
If your kids love books (or you’re trying to encourage more reading!), a small, easy-to-build bookshelf is a perfect DIY project. Not only does it give them a place to keep their favorite stories, but it also encourages them to organize their things.
Materials:
- 1×10 lumber (cut into several lengths depending on the size of the bookshelf)
- Screws
- Wood glue
- Sandpaper
- Paint or wood stain
Steps:
- Cut your wood to the desired lengths. For a simple shelf, you’ll need:
- 1 piece for the back panel (about 30 inches tall)
- 2 pieces for the side panels (about 12 inches wide)
- 2 pieces for the shelves (about 20 inches long)
- Assemble the bookshelf frame by attaching the side panels to the back panel with screws or wood glue.
- Attach the shelves to the side panels using screws (spacing the shelves based on the size of your kid’s books).
- Sand the bookshelf to make sure there are no sharp edges.
- Paint or stain the bookshelf in a color that matches your child’s room decor.
This DIY bookshelf will give your little one a perfect space to organize their books and display some of their favorite items, like toys or stuffed animals.
4. Simple Step Stool

A step stool is a great project for toddlers and young children who want to reach the sink or countertop. Plus, it helps foster independence as they can use it to help in the kitchen or bathroom.
Materials:
- 1×8 wood for the stool top and legs
- Screws
- Sandpaper
- Paint (optional)
Steps:
- Cut the wood into these pieces:
- 1 piece for the top (about 12 inches wide and 8 inches deep)
- 4 pieces for the legs (about 6 inches long)
- Attach the legs to the four corners of the top piece with screws. Make sure they are secured tightly.
- Sand the stool to remove any rough edges.
- Paint or decorate the stool with your child’s favorite colors or patterns.
This simple project will help your child feel more confident and capable in their daily tasks!
5. Personalized Rocking Chair
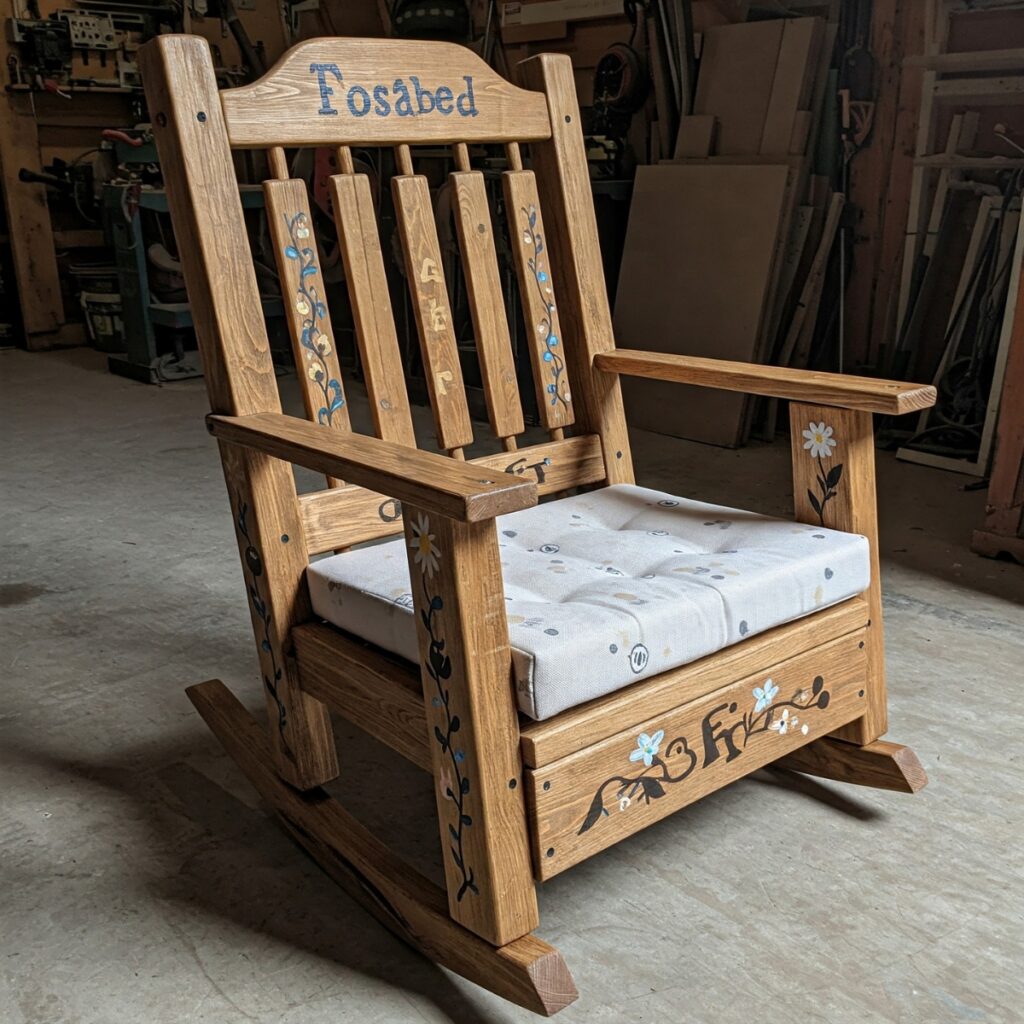
Building a mini rocking chair for your child can be a little more involved, but it’s totally worth it. Not only will they love the chair for reading or relaxing, but it will be something special they can treasure for years.
Materials:
- Wooden slats or 2×4 lumber for the frame
- Screws
- Sandpaper
- Paint (optional)
Steps:
- Cut your wood into pieces:
- 2 pieces for the arms (about 10 inches long)
- 2 pieces for the legs (curved for the rocker part, about 12 inches long)
- 1 piece for the seat (about 16 inches wide)
- 1 piece for the backrest (about 20 inches tall)
- Assemble the frame by attaching the arms, legs, seat, and backrest.
- Sand down the edges to prevent any sharp points.
- Paint the rocking chair in fun colors, or leave it unfinished for a natural look.
This chair will give your child a cozy spot to rock and relax, and they’ll be so proud of the fact that they helped build it!
Final Thoughts
While working on your DIY kids’ furniture projects, you can also enhance your child’s play and learning space with some great additions from Naomi Home. For outdoor fun, the Kids Canopy Covered Cedar Sandbox with Foldable Bench Seats offers a perfect place for play and relaxation, and pairs beautifully with a DIY outdoor play table or seating area.
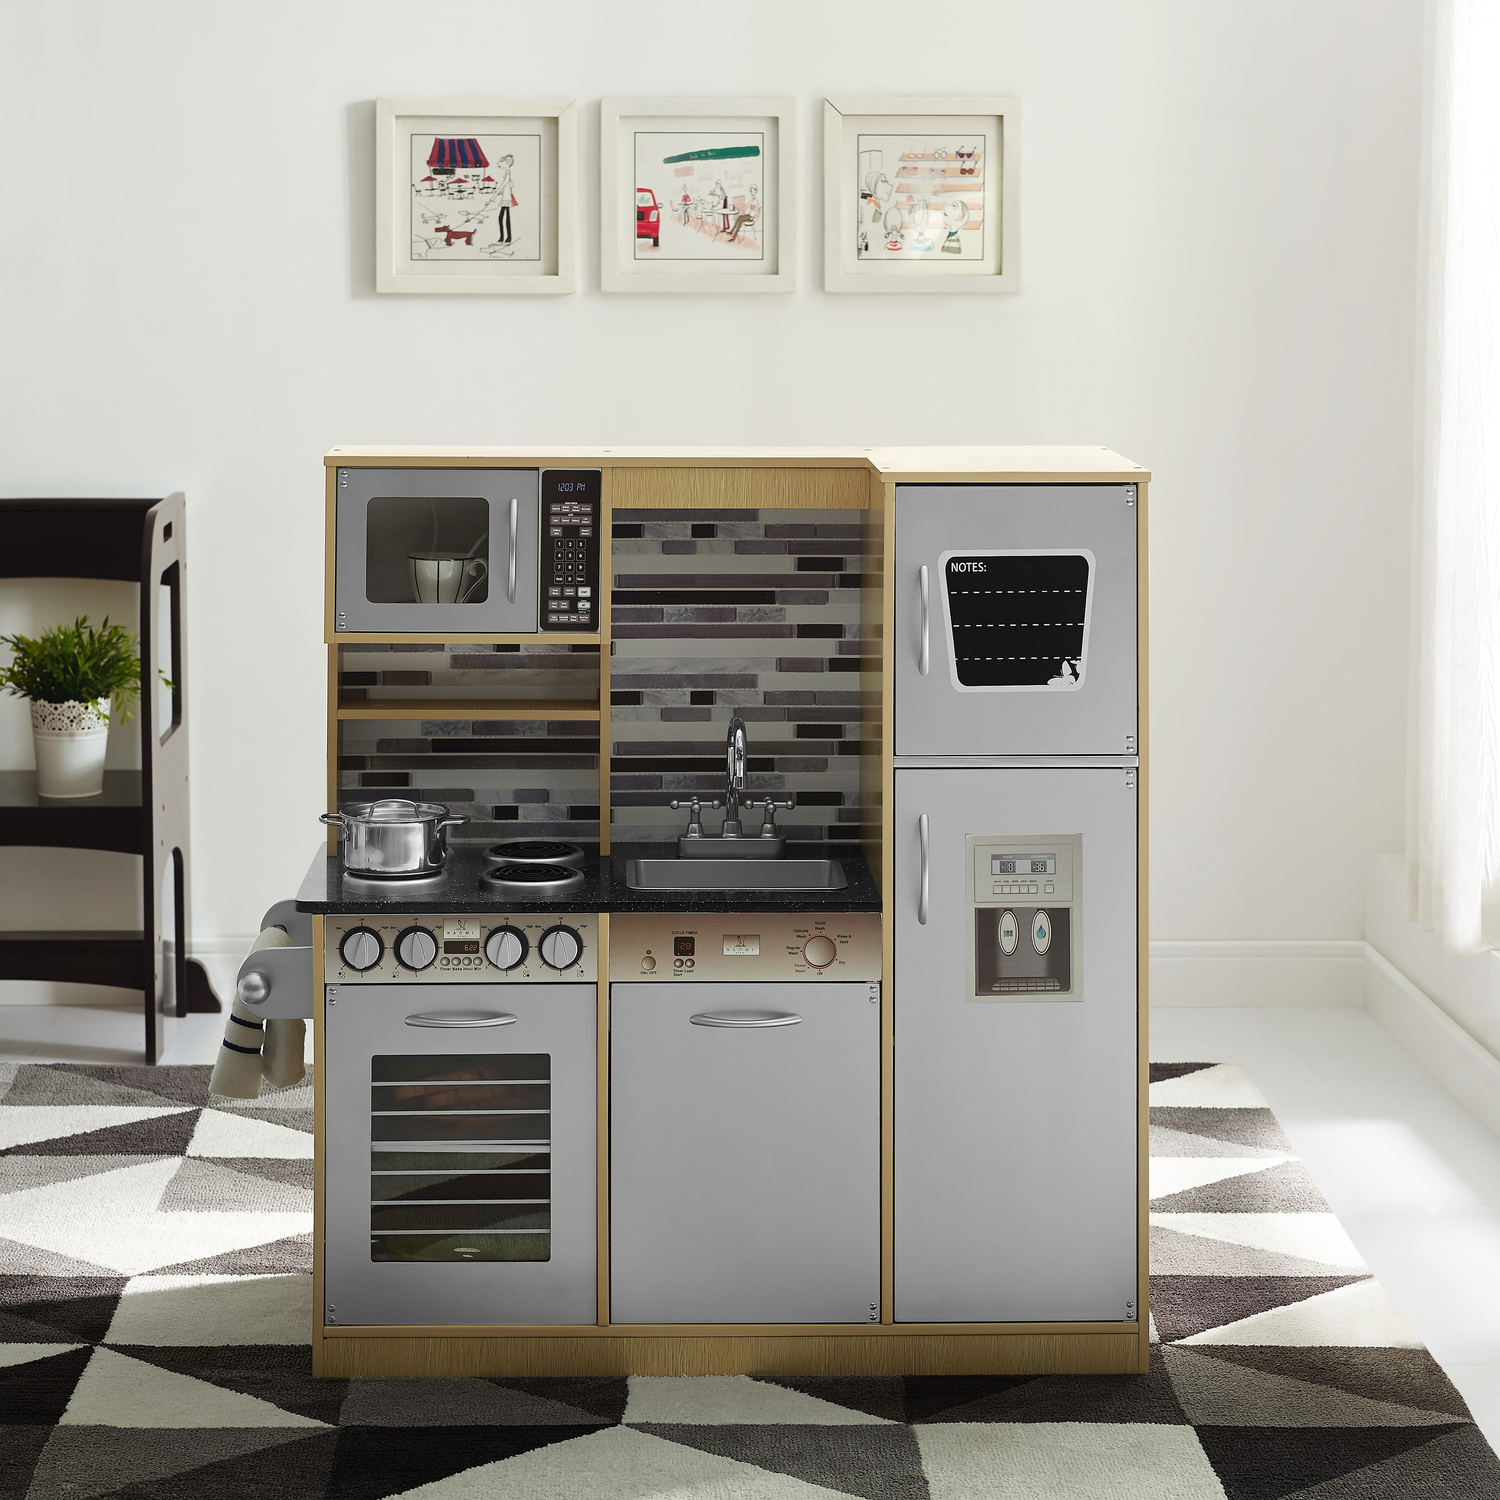
For indoor play, the Play Kitchen Set adds a touch of realism to your child’s pretend play, encouraging creativity while they organize their kitchen area with DIY furniture. Add a cozy touch to their room with the Kids Canopy Doll Bed, where they can display their handmade doll furniture, and pair it with the Nancy Kids Toy Storage with Bookshelves to store their DIY creations.
Whether it’s a cozy doll bed, a fun step stool, or a handy toy storage unit, these additions will not only complement your handmade creations but also make your child’s environment more engaging and organized. By blending the charm of DIY with ready-to-use furniture, you’re setting the stage for endless hours of imaginative play and learning. Happy crafting and start designing!